In this guide I will show you how to install your Pure Engineering / GroupGets Breakout board to your Raspberry Pi 2b, and install two different programs for your Lepton Thermal Imager. When you are done following this guide you will have a couple cool new ways to use your lepton thermal imager.
Directory
- P1 — Formatting the microSD Card
- P1a — Windows
- P1b — Mac OS
- P1c — Linux
- P2 — Transferring NOOBS OS to the Micro SD Card
- P3 — Connect the Pure Breakout board to the Raspberry Pi 2b
- P4 — Installing Raspian, configuring the Pi, and logging into your Raspberry Pi2
- P4a — Installing Raspian
- P4b — Configuring the Pi
- P4c — Logging into your Raspberry Pi2
- P5— Installing Thermal video overlay “pylepton” and required packages
Required Parts
- 1x Raspberry Pi 3 (it will also work on the Pi 2)
- 1x MicroSD Card 8GB or larger. This is what we use here: SanDisk Ultra 32GB microSDHC Card
- 1x FLIR Lepton Thermal Imager
- 1x FLIR Lepton Breakout Board
- 8x Female to Female jumper wires
- 1x Keyboard and Mouse
- 1x Micro USB cable and wall adaptor
- 1x Monitor with HDMI port or HDMI to DVI converter
- 1x HDMI cable
- 1x Ethernet cable
- 1x Raspberry PI 5MP Camera Board Module v2
P1 — Formatting the microSD Card
P1a — Windows
1 — Follow this link and accept the agreement and download SDFormatter. Once downloaded follow the installation instructions. Then open the program and follow the steps below.
2— Insert your microSD card into your computer then Open SDFormatter V4.0. Make sure that the Drive letter is correct.

3 — Select Option and choose “FULL (Erase)” for the format type, and “ON” for the format size adjustment. Then press OK.

4 — When formatting is complete press OK and close the program.

P1b — Mac OS
1 — Select the SD card volume and choose Erase with MS-DOS format.
P1c — Linux
1 — Go here and follow Norman Dunbar’s guide to format your microSD card in Linux.
P2 — Transferring NOOBS OS to the Micro SD Card
1 — Go to https://www.raspberrypi.org/downloads/ and download “NOOBS” (New Out Of the Box Software).

2 — Once the download is complete right click the file and select “Extract All”.

3 — Extract the file to your Desktop.

4 — Now open the folder that you extracted and open your micro sd card. Then drag all of the files within the NOOBS_v1_4_0 folder to your microSD card.

5 — Once the transfer is complete insert your microSD card into your Raspberry Pi.

P3 — Connect the Pure Breakout board to the Raspberry Pi 2b
1 — Match your female to female jumpers wires to the images below (note: your jumper wires may differ in color). You can also use the list below.
- CS -> Pin 24, CE0
- MOSI -> Pin 19, MOSI
- MISO -> Pin 21, MISO
- CLK -> Pin 23, CLK
- GND -> Pin 6, GND
- VIN -> Pin 1, 3V3
- SDA -> Pin 3, SDA
- SCL -> Pin 5, SCL


2 — Once you have attached the breakout board, connect your monitor, keyboard, mouse, ethernet cable, and finally the micro USB cable to power the board.

P4 — Installing Raspian, configuring the Pi, and logging into your Raspberry Pi2
P4a — Installing Raspian
1 — Select the checkbox next to “Raspian”, then set your Language at the bottom, and finally click Install.


P4b — Configuring the Pi
1— When installation is complete use the arrow keys on your keyboard and select option 8 “Advanced Options”.

2 — Now select option A “SPI”.

3— Select “Yes” to enable the SPI interface.

4 — Press “Ok”.

5— Select “Yes” to load the SPI kernel by default.

6 — Press “Ok”.

7 — Again select option 8 “Advanced Options”.

8 — Now select option A7 “I2C”.

9 — Select “Yes” to enable the I2C interface.

10 — Press “Ok”.

11 — Select “Yes” to load the I2C interface by default.

12 — Press “Ok”.

13— If you have the Raspberry PI 5MP Camera Board Module select option 8 “Advanced Options” and press Enter, if you do not have the Pi Cam skip to step 16 in this section.

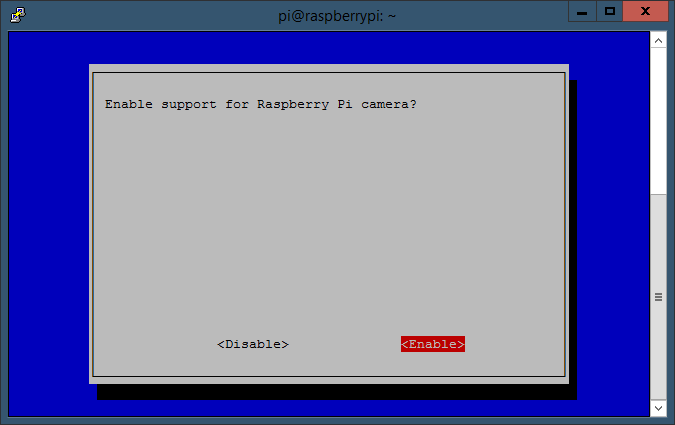
14 — Now select option 5 “Enable Camera” and press Enter.

15— Select “Enable” and press Enter.
16— Now select “Finish” located on the lower right hand corner.

17— Select “Yes” to reboot the Raspberry Pi.

P4c — Logging into your Raspberry Pi2
1 — After the Pi has rebooted you will see the following. Enter pi and press Enter.

2 — Now enter raspberry and press Enter.

P5 — Installing Thermal video overlay “pylepton” and required packages
1 — To use the thermal video overlay you must have a Raspberry PI 5MP Camera Board Module installed and enabled.
2— Type the following then press Enter.
sudo apt-get install python-opencv

3— When you see this type y and press Enter.

4 — Now type the following and press Enter.
git clone https://github.com/kekiefer/pylepton.git

5 — Once that is complete type what’s below and press Enter.
cd pylepton

6 — Now type the following and press Enter.

7 — Now type the following and press Enter to start the overlay software. -a 155 is the alpha (transparency) value for the thermal image, -a 255 being 100% thermal image and -a 0 being 0% thermal image. You can see other commands by typing pylepton_overlay --help.
pylepton_overlay -a 155

8 — A screenshot of the overlayed thermal video at -a 155. To stop the program from running press ctrl+c.

9 — To take a picture using the Lepton type the following. This will save an image to the directory that you are currently in, in this case /home/pi/pylepton. You can see other commands by typing pylepton_capture --help.
pylepton_capture output.png


Image from the capture (resized)
So this concludes this guide, if you have any suggestions or changes please post them in the comments. The Lepton thermal imagers are available below with the Pure breakout board available as an add on: