The GroupGets Drone Thermal Mount for DJI H3-2D gimbal can be 3D printed yourself or purchased from Shapeways, here is a link to Shapeways and if you have your own printer you can download the STL files in a zip here. The mount is designed to be threaded with metal threads, and retains the ability to keep your GoPro as well as DroneThermal breakout attached to your gimbal.

Below are instructions on how to tap and install metal inserts into your 3D Printed Drone Thermal Mount, as well as the tools required.
Tools Required:
- Drill
- #37 Straight Shank Drill Bit
- Helical Thread Repair Kit: M2.5 x 0.45, 3.8mm (1.5xD) Length
- T-Handle Tap Wrench
- Two 2.5mm x 8mm metric screws with nuts

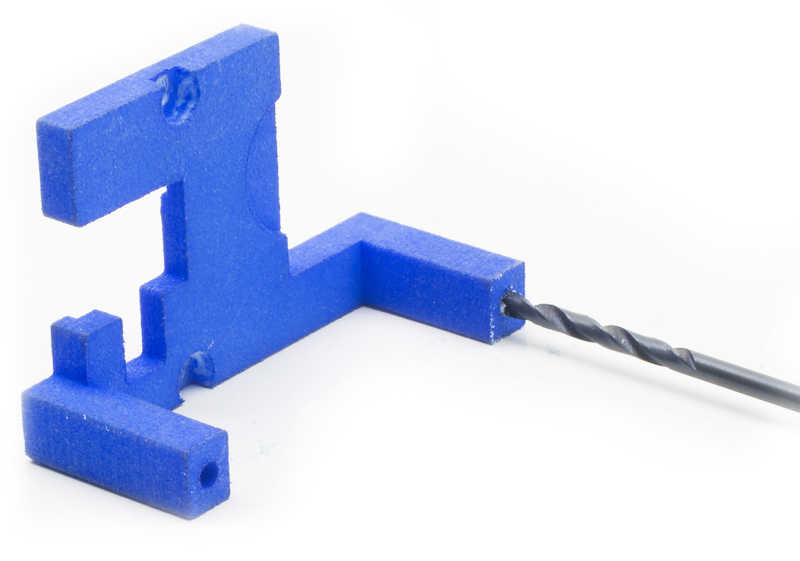
First insert the Drill Bit into your drill and carefully drill the two holes on the 3D Printed Mount Plate (the part on the left in the image below). Then drill the two holes on the back where the mount will attach to the gimbal.

Next attach the Tap to your T-Handle Wrench, then slowly tap the mounting bracket from back to front. Let the Tap extend past the front side of the bracket, then carefully reverse the tap back out.

Now tap the back of the other part of the mount.


Now get your Helical Insert installation tool, and two M2.5 x 0.45, 3.8mm Helical Inserts (supplied with the tap kit linked above).

Insert one Helical Insert over the installation tool, aligning the small metal bar within the insert in the slot of the installation tool. The small metal bar should be facing away from the handle of the installation tool.

Now carefully insert the Helical Insert into the hole from the back of the bracket that you tapped previously. Screw the insert into the taped hole by gently rotating the Helical insert clockwise, so that it screws into the hole.

Make sure to keep the Helical Insert aligned flat with the bracket so that the hole does not get cross threaded.
When the insert is just below the back side of the hole, remove the installation tool.

Repeat the last few steps to insert the other Helical Insert into the remaining three holes. To break the tang off of the inserts you can insert the screw into the threaded bracket which will break the tang.

Congratulations, your Drone Thermal mount now has metal threads! DroneThermal breakout board is available in our store here or as an accessory on any of GroupGets Lepton campaigns: 50 degree, 50 degree with shutter, and 25 degree.